How to make akara is easier than many people think, and once you learn the right technique, you’ll be able to make crispy, golden, and fluffy bean cakes right at home.
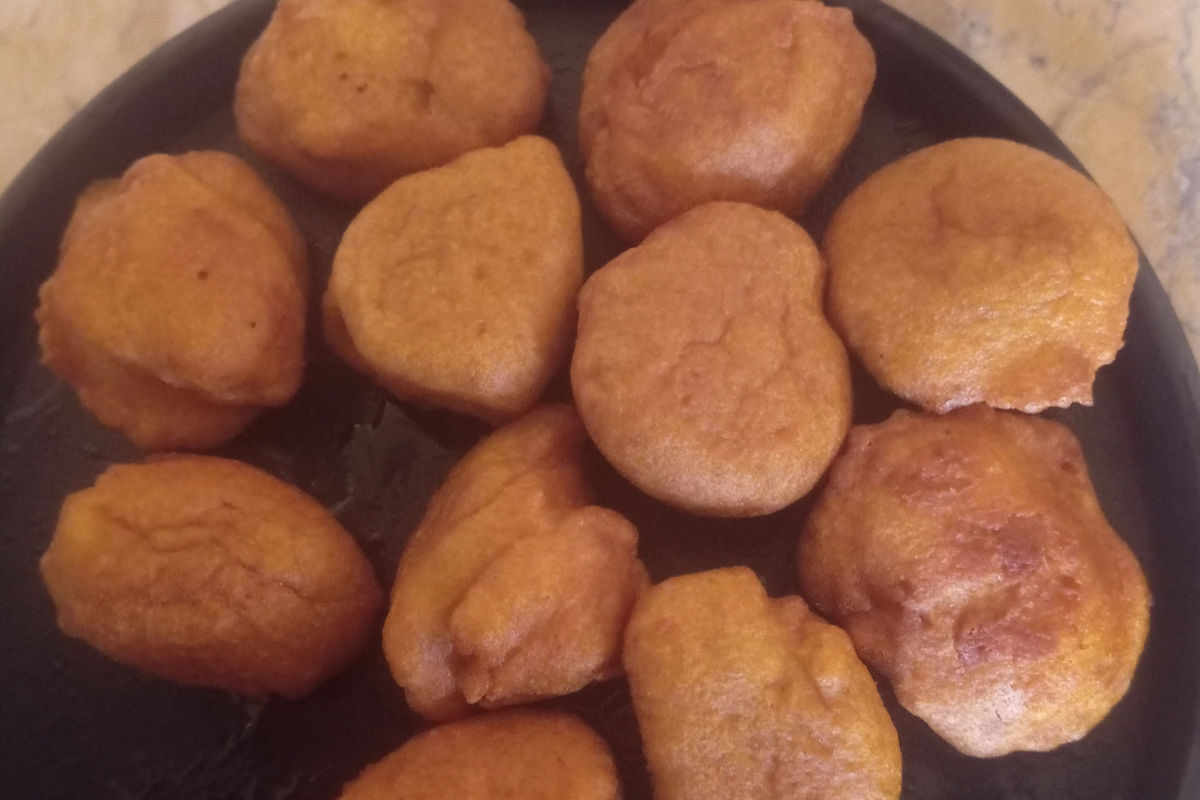
If you’ve ever walked into a kitchen where akara is frying, you know how irresistible the aroma can be. Crispy on the outside, soft and fluffy on the inside, akara is one of those comfort foods that brings people together.
Whether it’s served as a hearty breakfast, a quick snack, or alongside pap (ogi), freshly made akara always disappears fast.
If you’re wondering how to make this food, this easy step-by-step recipe will show you everything you need to know.
With just a few simple ingredients, you can make delicious homemade food that’s golden brown, light, and packed with flavor. In this guide, I’ll show you the ingredients you’ll need, the benefits of each key ingredient, and the step-by-step method for making perfect akara every time.
Why You’ll Love This Homemade Akara
This food recipe is easy to prepare, budget-friendly, and made with wholesome ingredients. It’s crispy on the outside, fluffy on the inside, and pairs perfectly with pap (ogi), bread, custard, or tea.
Whether you’re cooking for your family or making akara for sale, this recipe delivers delicious results every time.
Ingredients for Akara
You’ll Need
2 cups black-eyed peas (beans)
1 medium onion
2–3 fresh peppers (Scotch bonnet or your preferred chili)
½ teaspoon salt (or to taste)
Water, as needed for blending
Vegetable oil, for deep frying
Benefits of the Key Ingredients in this yummy food
The ingredients used in akara are simple, but each one plays an important role in both flavor and nutrition.
Benefits of Black-Eyed Peas (Beans)
Black-eyed peas are the main ingredient in akara and an excellent source of plant-based protein.
They are also rich in dietary fiber, which supports healthy digestion and helps keep you feeling full.
In addition, beans provide important nutrients such as iron, folate, magnesium, and potassium, making them a nutritious addition to a balanced diet.
Benefits of Onions in how to fry akara
Onions give this food its delicious savory flavor and aroma. They are a good source of vitamin C and contain antioxidants that help protect the body’s cells. Onions also add moisture to the batter, resulting in a softer and more flavorful akara.
Benefits of Fresh Peppers in how to fry akara
Fresh peppers bring a pleasant heat and vibrant flavor to akara. They are rich in vitamin C and antioxidants, making them a nutritious ingredient while enhancing the overall taste of the bean cakes.
Benefits of Vegetable Oil
Vegetable oil helps create the crispy, golden exterior that makes akara so enjoyable. Choosing fresh, clean oil and maintaining the correct frying temperature produces the best texture and flavor.
How to Make Akara
Step 1: Soak the Beans
Wash the beans thoroughly and soak them in water for about 30 minutes to 1 hour. This softens the skins, making them easier to remove.
Step 2: Peel the Beans
Rub the soaked beans between your hands to loosen the skins. Rinse several times until most of the skins have been removed, then drain the beans well. You can read how to dehull your beans faster here.
Step 3: Blend the Ingredients
Add the peeled beans, onions, peppers, and a small amount of water to a blender. Blend until you have a smooth, thick batter.
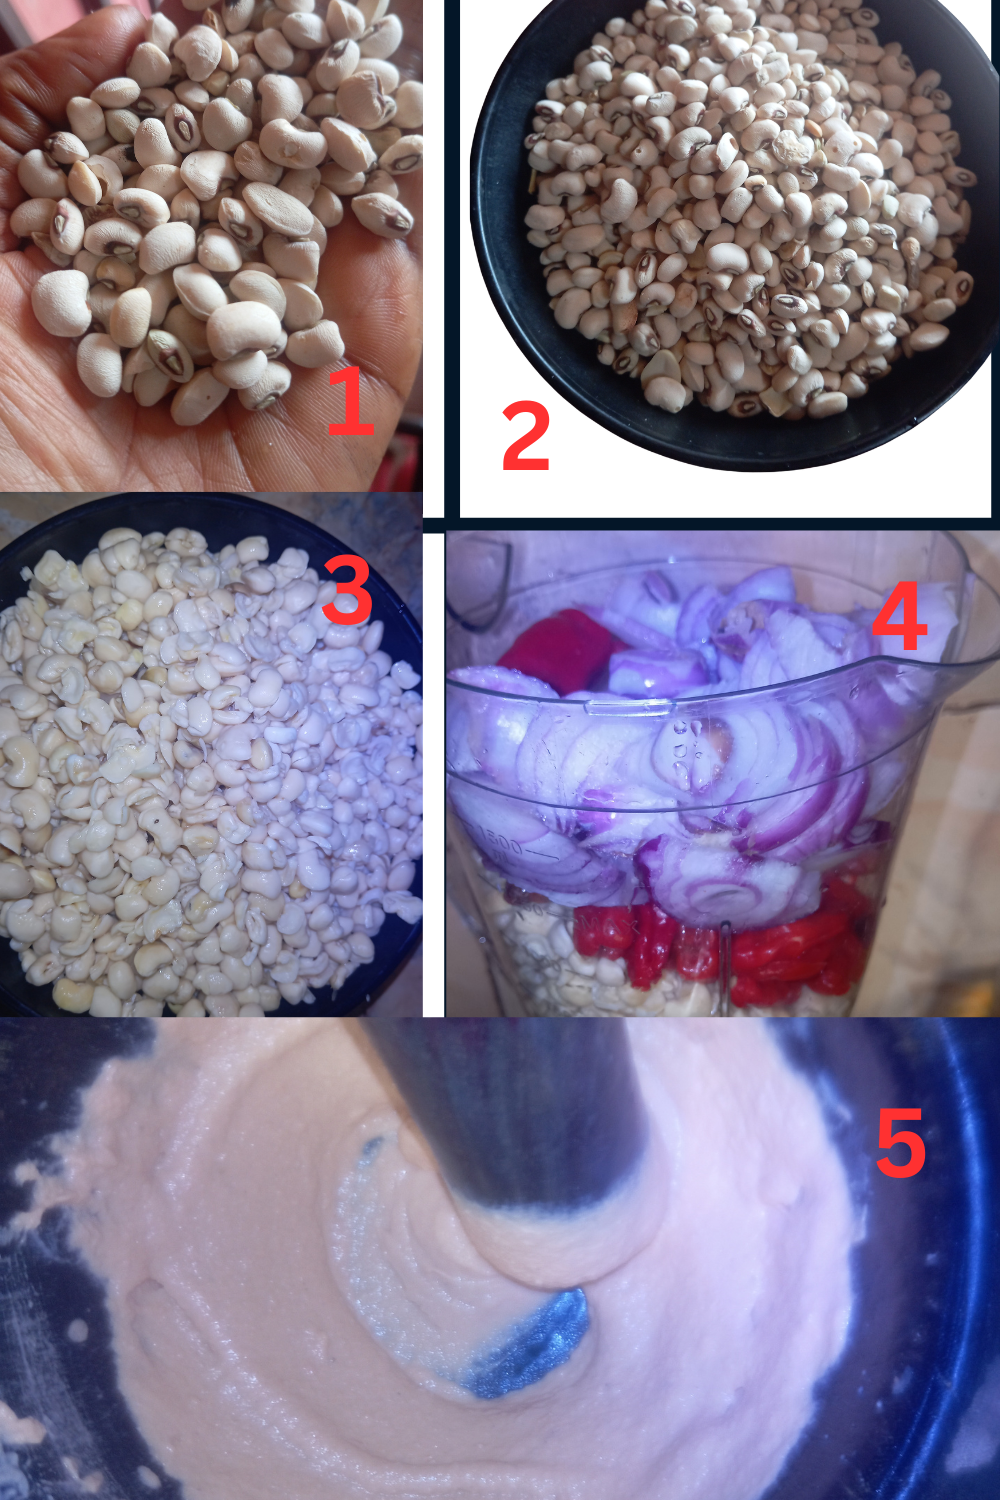
Step 4: Whisk the Batter
Transfer the batter to a large bowl and whisk vigorously for 3 to 5 minutes. This incorporates air into the batter, making the akara lighter and fluffier. Stir in the salt.
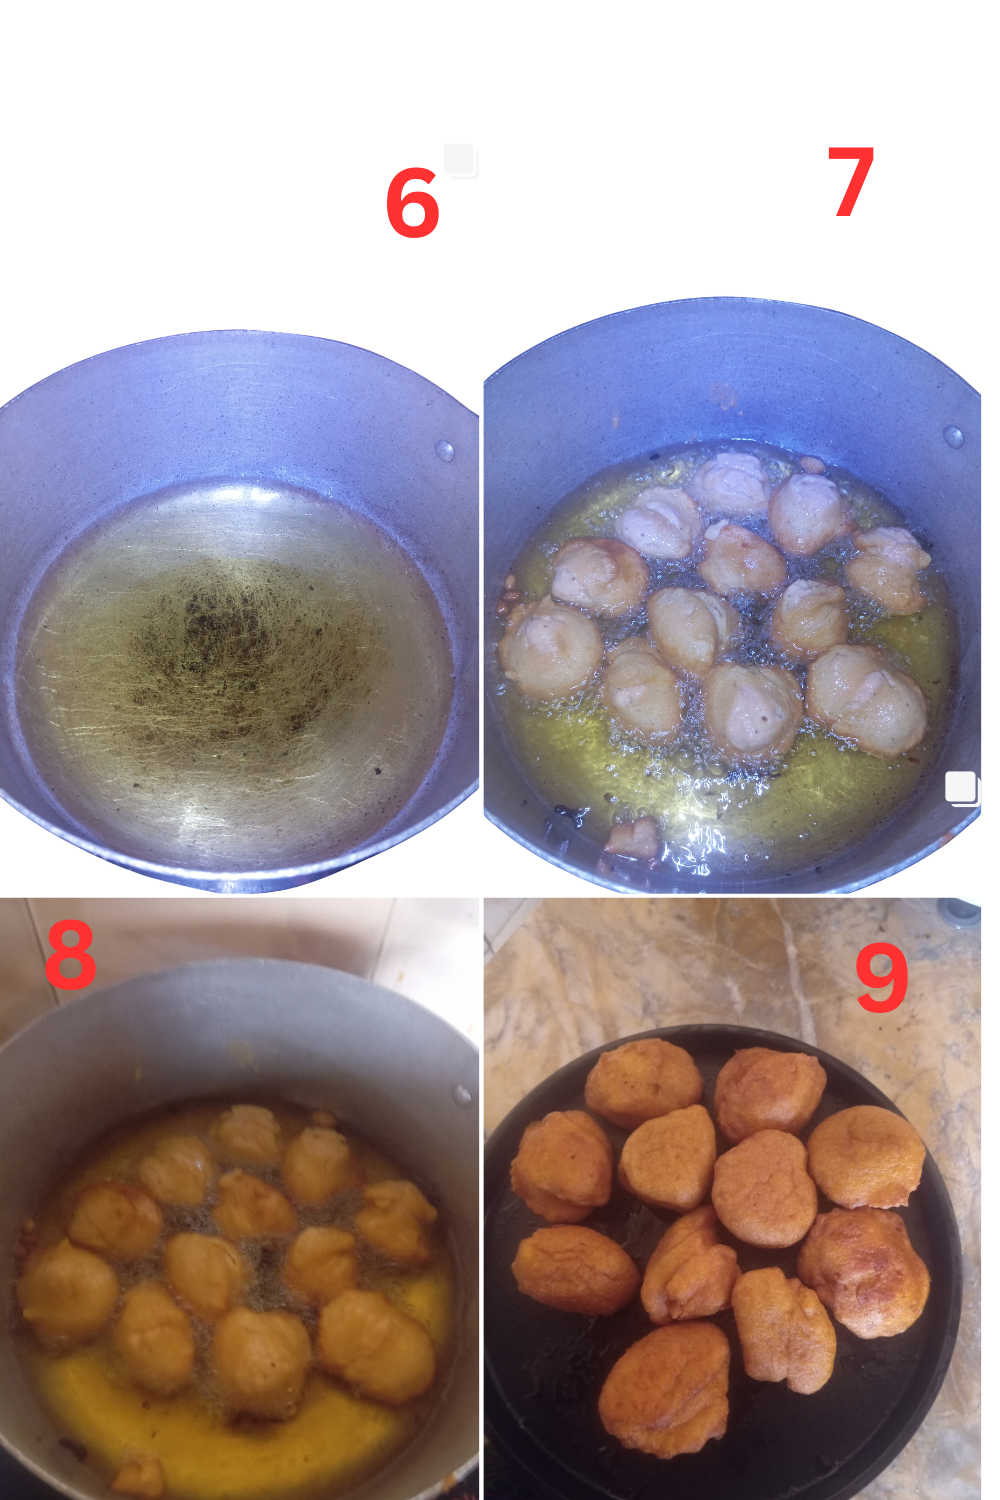
Step 5: Heat the Oil
Pour enough vegetable oil into a deep frying pan or pot and heat over medium heat. To test if the oil is ready, drop a small amount of batter into it. If it sizzles and floats to the surface, the oil is hot enough.
Step 6: Fry the Akara
Carefully scoop portions of the batter into the hot oil using a spoon. Fry until golden brown on one side, then turn and cook the other side until evenly browned. Remove the akara with a slotted spoon and place it on paper towels to drain excess oil.
Tips for Making the Best Akara
Peel the beans thoroughly for a smoother batter.
Use only a small amount of water while blending.
Whisk the batter well to make the akara light and fluffy.
Fry over medium heat to cook the inside without burning the outside.
Serve akara immediately while it’s still hot and crispy.
Frequently Asked Questions
Why is my akara flat instead of fluffy?
A watery batter or insufficient whisking can make akara dense instead of light and fluffy.
Can I make this without peeling the beans?
Yes, but peeled beans produce a smoother batter and a lighter texture.
Can I prepare the batter ahead of time?
Yes. You can refrigerate the batter for several hours before frying. Stir it well before use.
What can I serve with akara?
Akara is delicious with pap (ogi), bread, custard, tea, or as a snack on its own.
Conclusion
Now that you know how to make this yummy food, you can enjoy this classic Nigerian favorite whenever you like.
With simple ingredients and a few helpful tips, you’ll be able to make crispy, fluffy akara that’s perfect for breakfast, snacks, or sharing with family and friends.
Once you try this homemade recipe, it’s sure to become one of your favorites.
How to dehull beans In 10 minutes
Ten Nigerian Soups You Need To Try
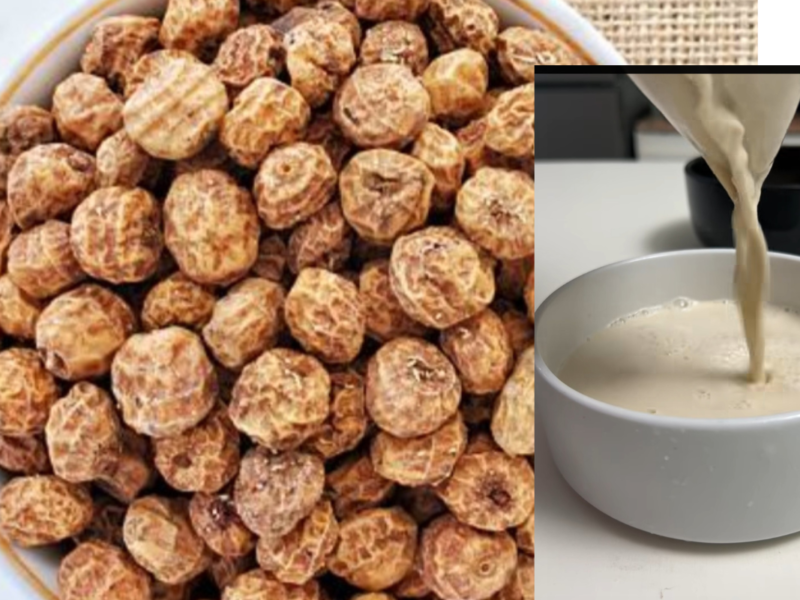
How to Make Tiger Nut Drink with Coconut and Dates